When I ruined my laptop from starting - and fixed it.
First wave
Background and about GRUB boot menu
Most common is to have only one operating system on a computer. But on this laptop, Lenovo ThinkPad T430s, I have several operating systems. At this point I had six operating systems; Microsoft Windows and five variants of Linux operating systems. All on same SSD drive, but on different partitions of the drive.
Partition means that the physical drive is splitted into several parts softwarewise. This works so that when I start the laptop, it will not start an operating system directly. Instead it will open a menu with all operating systems listed and I can select which one to start. If I wait a couple of seconds, it will start the default one automatically.
This menu is called GRUB, GRand Unified Bootloader, or actually GRUB 2 for the second generation (first generation is now renamed to GRUB legacy).
If Windows is one of the operating systems, it is recommended to install Windows first followed by the Linux operating system(s). The GRUB menu is handled by the latest installed operating system.
The task
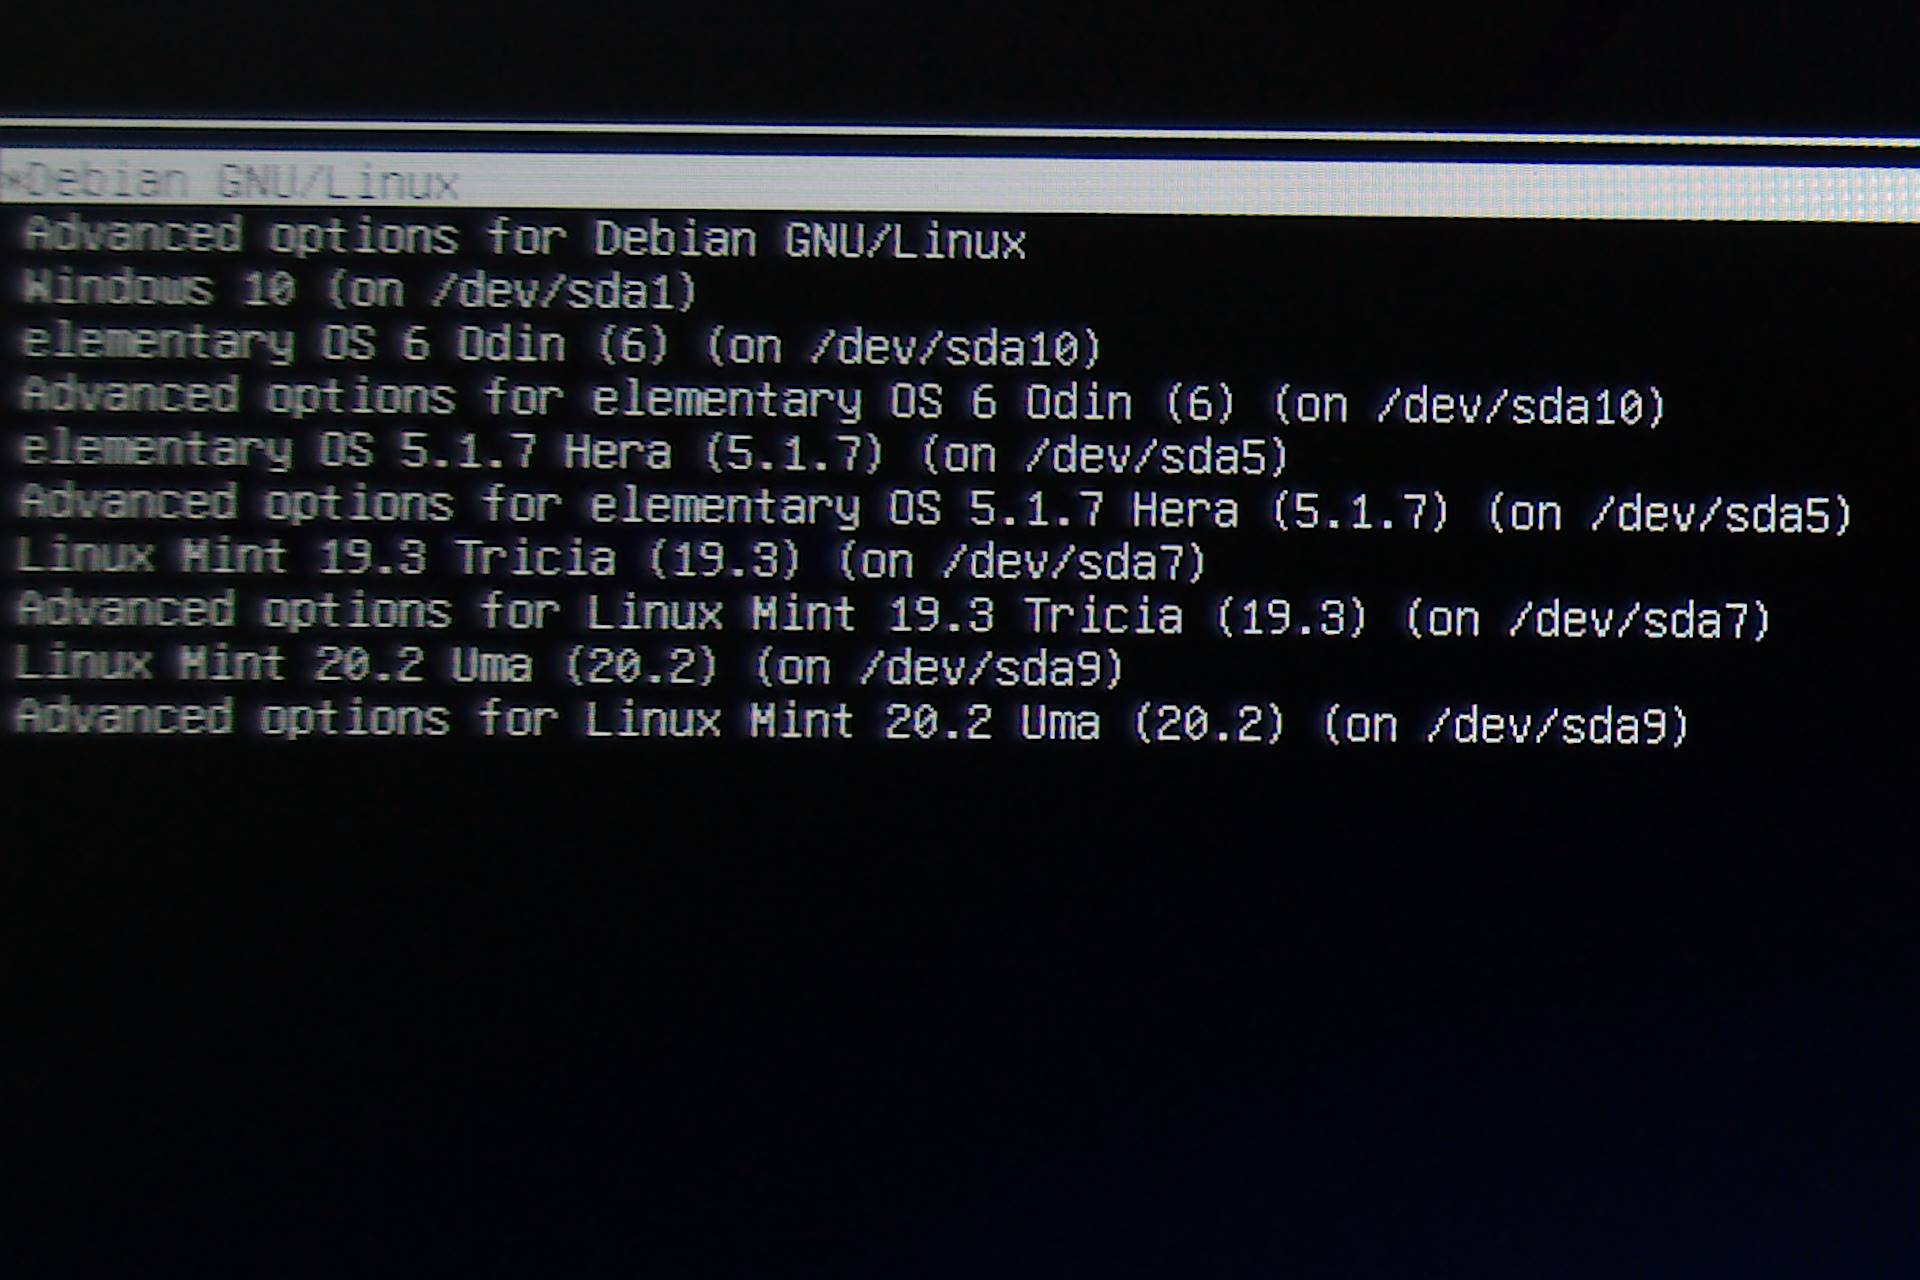
Below is my GRUB menu when I started this task. The information in brackets for each entry states which partition it is on. For any reason, the GRUB menu does not tell the partition for the first default operating system.

So now to my task: To delete the operating systems I do not want anymore and by that free up space on the drive. It is the first time I do this. I have been hesitant to do this as I have been concerned for troubles, although I have tried to learn how to and not to do. Yeah...
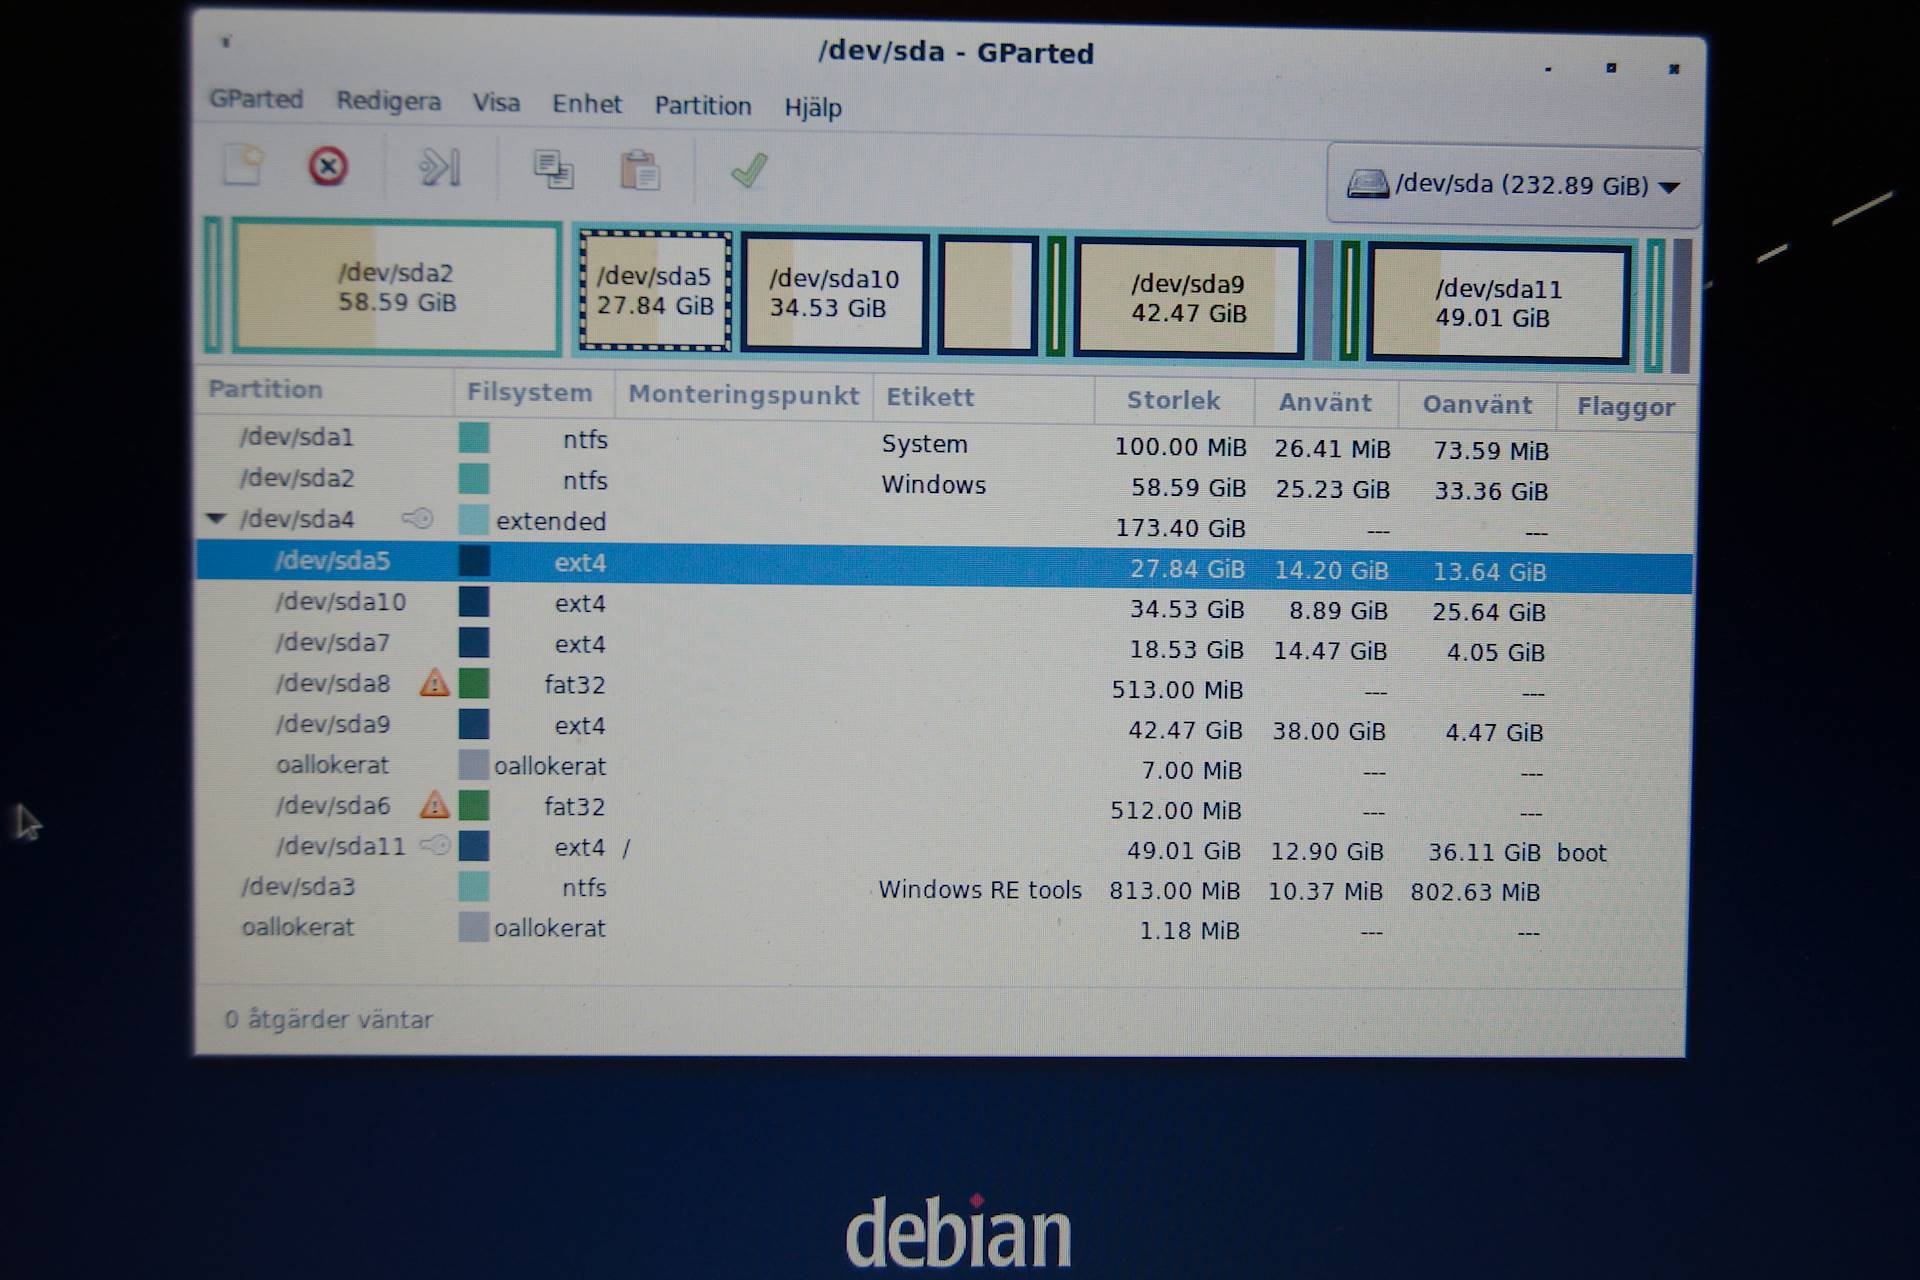
It is sda5 (elementary 5) and sda7 (Mint 19) I plan to delete. The tool I use is GParted (here with menu in Swedish).

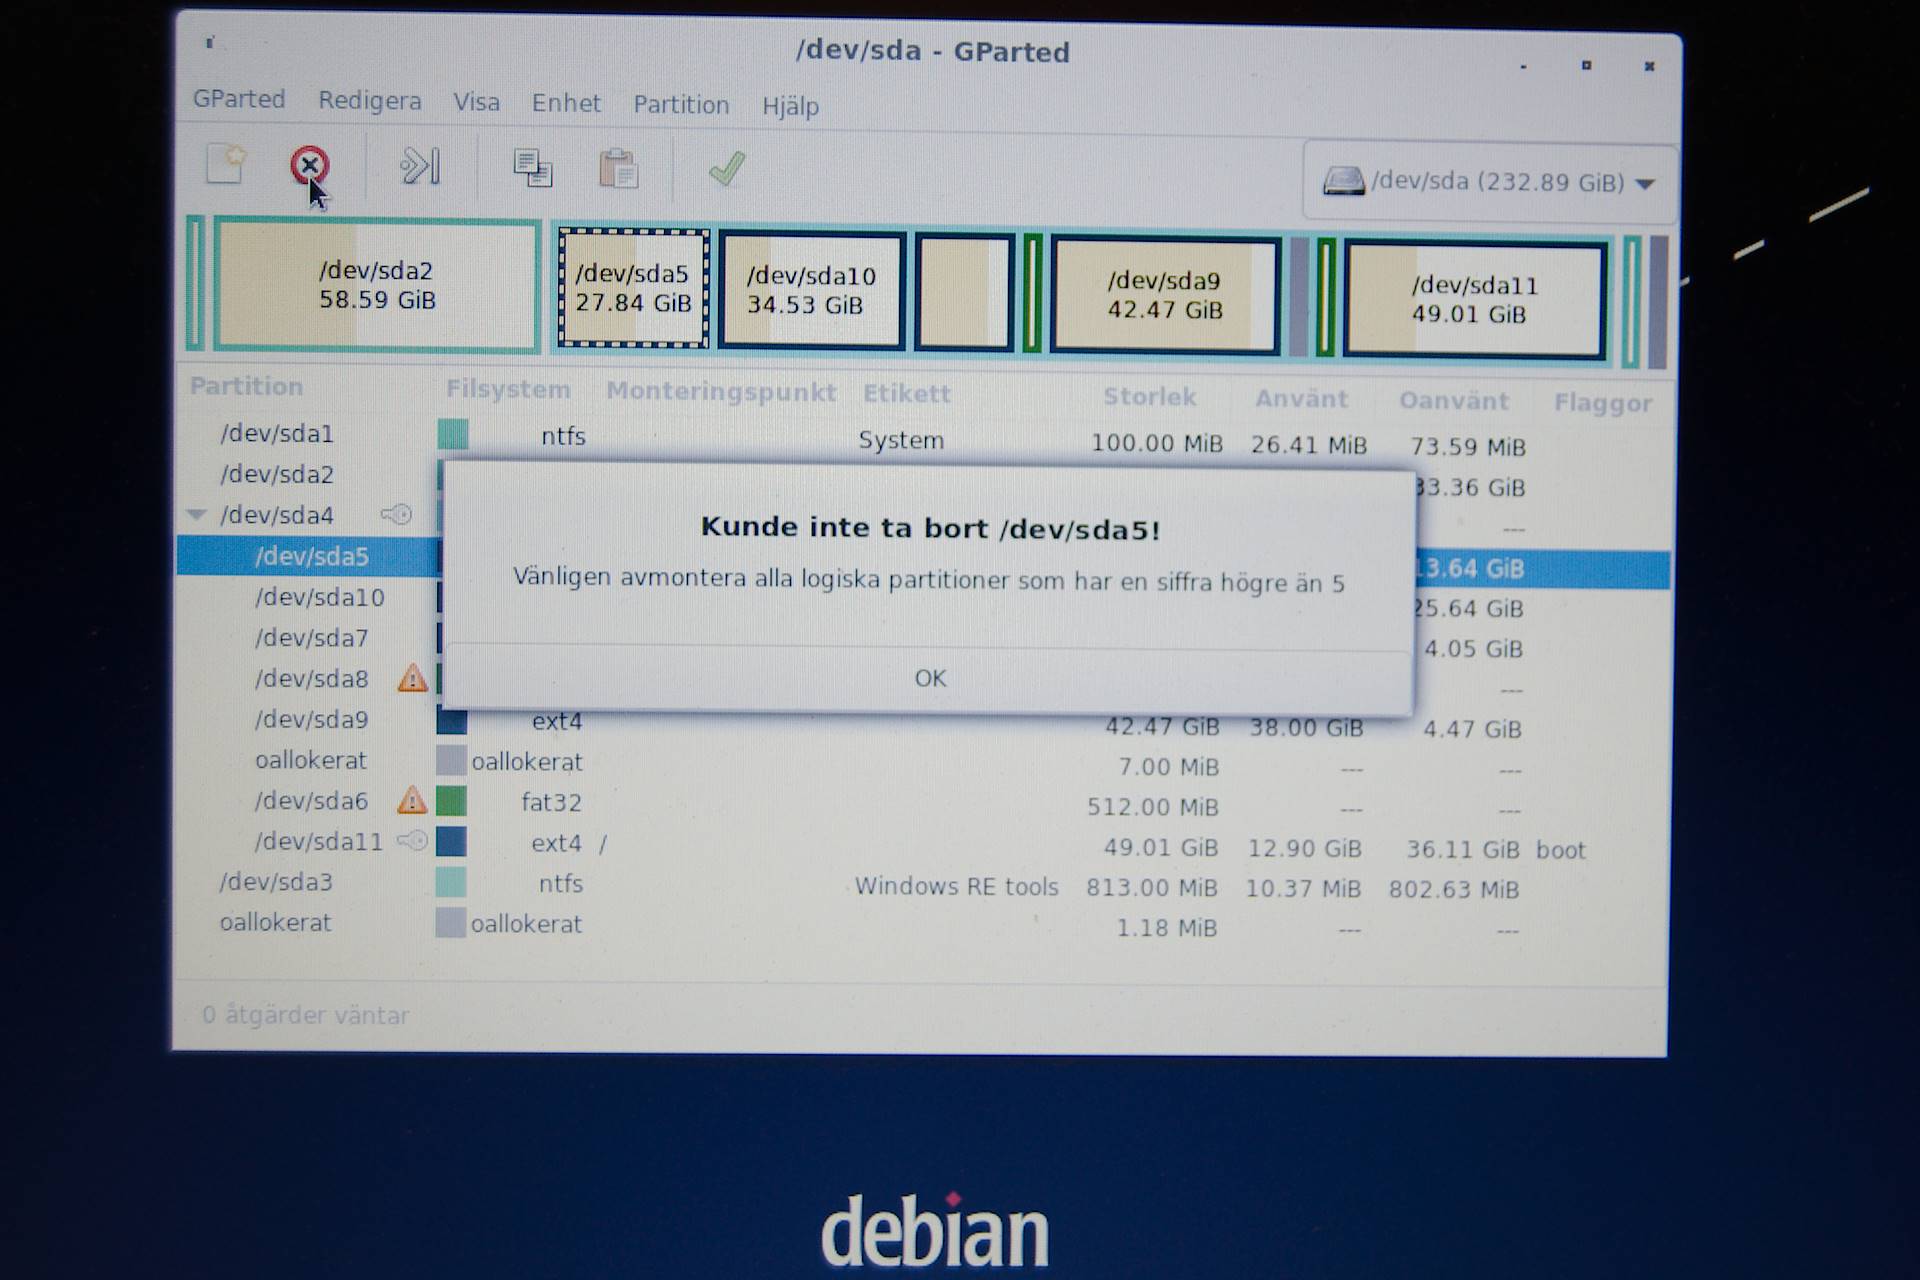
I start GParted from the latest installed operating system, i.e. Debian 11 on sda11. I delete sda5. However, when I try to execute the delete action, a pop-up message tells me (in Swedish): Please unmount all logical partitions higher than 5.

This is impossible to do as I am working from sda11. I cannot figure out how I could move to a lower sda than 5 and execute from there. I believe it is possible to handle from it Windows which is on a lower number, but I have not explored how to do it from Windows.
So, as next step I instead start elementary 5 on sda5. From there I can without any problem delete Mint 19 on sda7, because all sda´s higher than 5 are unmounted. However, I did not foresee this would renumber the sda´s above sda7. Because automatically sda11, which holds the GRUB meny, becomes sda10.
If I now had started the terminal and executed "sudo update-grub", it had probably repaired the GRUB menu and the computer had worked. But it still had not solved how to delete partition sda5.
But I do not execute the "sudo update-grub"command. Instead I restart the laptop. Now the GRUB meny can not be found... because booting is looking for sda11 that does not exist. Instead GRUB rescue menu starts. But, I skip the GRUB rescue tool. Instead I insert a USB-memory with a live-version of Debian 11 and restart the computer. It actually is the same Debian 11 as I used when I installed Debian 11 a few days earlier, but any live-USB would do.
I open the terminal window to follow the instruction in the article "How to Fix Grub error: no such partition Grub Rescue". I know I should not type commands I find on the internet and do not understand. But I decide this is a credible source. Most steps works well. But in the latter steps, when I tabulate to select Yes, I cannot get it to accept and execute. Restart of the computer confirms my repair has not worked.
While pondering what to do, I leave the terminal and start GParted on the live-USB (I had to install it from the Debian repository, but no issue to do that). I delete sda5, which is no problem at all from the live-USB.
Now I am considering what to do to repair the GRUB. Should I ran the command instruction in the terminal again? Another option can likely been a USB/CD with repair tools (I have some CDs in a box).
However, I decide to test a simple and dirty method: The Debian 11 Bullseye on the drive was installed only a few days ago. Beside a few settings, nothing important. So I decide to install Debian again, overwriting on the same partition.
And yes, the new installation works and it also fix the GRUB issues! The reinstallation is the latest installed operating system and GRUB is connected to it.
For fun, I also test the command "sudo update-grub" from the terminal, and it works to refresh the GRUB meny.
Next time
My conclusion of how I believe I should have done this from start to avoid any problem:
- Do all of the work from the live-USB from beginning.
- Start the GParted on the live-USB and delete both sda´s I did not want any more.
- Open the terminal and execute the command "sudo update-grub".
When I then restart the computer, I believe it all had worked properly.
At least this is my thought strategy for next time.
A final note. Before I started all above, all essential data on the whole drive was stored on backup. So even if everything had been lost on the drive, it would not have caused me any big trouble.
Second wave
Now, a couple of months later, it is time to continue to cleanup the same SSD drive. I have moved the Microsoft Windows 10 Pro to a separate SSD drive and will therefore delete Windows from this drive. I also have some unallocated partitions and more that I can cleanup. My goal for this exercise is to only have partitions for three Linux operating systems; Debian, Elementary and Mint, plus a swap partition.
This time I will try ot do it without the troubles I got into last time. I look at my three Next time bullets above. I start a live-USB. Before I start the cleanup with the GParted tool, I try the "sudo update-grub" command in the terminal. But it does not work. I did not think about it last time, but it is reasonable it will not work directly because I must first come in to the relevant partition on the SSD drive. Beside mounting of the partition, there are several commands needed to execute, to reach the goal, ie kind of complicated for a novice like myself.
So, I decide for another strategy. The Linux Mint live-USB (I used Linux Mint 20.2 Cinnamon) is handy, because it includes a few "repair tools" that are useful. From the Linux Mint live-USB I use two tools: GParted and Boot Repair tools. And this way, it works! I cleanup the SSD drive with GParted. The work includes many steps to "move around" partitions, but finally I have achieved the partitions as I planned, and no unallocated waste. The Boot Repair tool works very well to analyze the boot system, and the Recommended repair that runs by itself makes the job to fix the Grub menu.
With the advanced option I also change the boot order in the GRUB menu; normally the latest installed operating system will be the default one in boot order, but here it is possible to change the boot order. In my case, I changed to Linux Mint. However the GRUB background is not the standard one delivered by Linux Mint. When I start Linux Mint, I open the terminal and run the "sudo update-grub" command, and next time the standard Linux Mint Grub background appears.
It is good to always have a live-USB with a operating system available in those situations. And especially one like Linux Mint which has included some additional tools. A dedicate rescue USB (or CD) with multiple repair tools can also be good to have in the pocket for more serious issues.
My second wave of disk cleanup and GRUB boot repair went smoothly!
Henrik Hemrin
31 August 2021 and 1 November 2021 (second wave)
Comments powered by CComment